Showing posts with label walls. Show all posts

Thursday, 1 August 2013

Bedroom 2 - Decorating Complete!

Apologies for the tardiness of this post! We did indeed get bedroom 2 finished and in time to get the radiator back on the wall for our lovely new boiler to be fitted (there will be a post on that soon I hope). Unfortunately, that weekend we also shifted everything that had been filling our living room up into bedroom 2 so it was out of the way which made taking "after" photos a bit tricky. I've had a stab at it though, so here we go...
Before: The walls weren't in a great state - there were some massive cracks (but mostly they were difficult to capture in a photo)
The plaster around the window has been repaired 
At the top of the window we removed a piece of wood that the curtain pole was attached to, re-plastered and put some proper coving in place.
The skirting didn't line up where an old chimney breast had been removed.

This wall had the old chimney breast in it and  hadn't been properly  plastered when they removed it. Although you can't see it from the photos, there has been a big improvement.

Before, During, After: The window

Currently we're using this space to store everything whilst we sort out our lounge
Once we've finished the lounge/diner we will finally be able to unpack and turn this from a storage space to a proper room - we'll post more pictures when we finally get to that stage. It still needs curtains and obviously we need to furnish it.

Work is beginning on the lounge/diner on the 12th August with our Electrician returning to sort out all of the many plug sockets that were left without electric after the kitchen was fixed and also to add some new ones in and replace the consumer unit whilst he's at it.

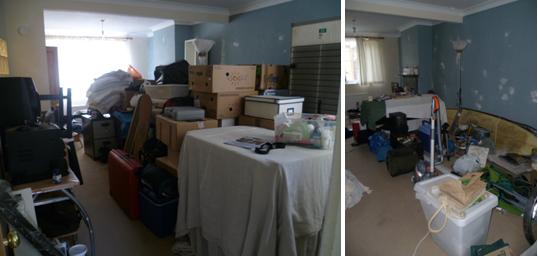
Here's a before and during of our poor lounge...
Left: Lounge/Diner just after we moved it; Right: current state... its getting better slowly!

Wednesday, 8 May 2013

Kitchen Improvements

We blogged a while ago about our Kitchen and the Bodged Electrics, which left the room in a bit of a sorry state. So, whilst we were sorting the study out over Easter, Kate's Dad came down to help us finish off the Kitchen.

Tiling and generally tidying up behind the fridge:
When we moved in to the house we found that there was a large patch of plaster missing on the wall behind the fridge. There were also several large holes and channels where wires had been chased through the walls in the past. There wasn't any skirting on the back wall, and the skirting on the right hand wall was only half painted. Furthermore, this bit of wall also housed two cooker switches, one of which had the spur running from it for the cupboard light and sockets in the lounge. Our electrician had sorted out these issues leaving us with just one safe (and legal) switch, but it left us with some broken tiles that needed replacing.

Unfortunately, we didn't get round to taking a "before picture" of this bit when we first moved in, so we pick up the tale after some painting, filling and plastering had taken place.

Before and After: Re-tiling, painting and adding Skirting Board
During: Thanks Daddy!
Re-tiling:
Another electrical issue we had was a socket overhanging the gas hob. This had to be moved out of the way and a blanking plate installed in its place. Again, this left us with quite a few broken or missing tiles, so Kate's Dad sorted that out too...
Before and After: Socket on the left replaced one where the blanking plate now lives
And closer up....good as new!
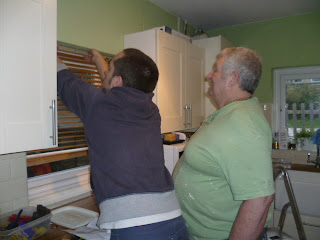
Putting up some blinds:
We are a bit over looked at the back of our house (and the front actually - the joy of a terraced house in the city), so we wanted some blinds in the Kitchen to add a bit of privacy and obviously to shade us from the sun when necessary! We picked up some reasonably priced Ikea Venetian blinds which we're mighty pleased with.
During
Before and After: Window 1
Before and After: Window 2
General Before/After:
This room is slowly changing so its easy to forget how different it is from when we first looked around...

Before: Estate Agent's Photo
After: It has already changed again since taking this - we've added a wine rack and unpacked our coffee machine!
Going Forward:
There are a few remaining fiddly jobs in the Kitchen (such as properly attaching some skirting behind the radiator which is currently just resting against the wall). Also, a few final tweaks will make it fully fit for purpose, such as adding these in the two corner cupboards to maximise our storage:

Le Mans Corner Storage Solution
But that is a little way off yet. For now, on with Bedroom 2! 

Tuesday, 30 April 2013

Bedroom 2 - The update...

The plasterer has been!  Here's the timelapse (again!) for the plastering being done.  It cuts out early as I managed to mess up charging the camera, but hopefully you should get the gist!


It has thrown up a few surprises, such as realising that the ceiling is not properly fixed in place.  It appears that whoever plasterboarded the ceiling just nailed the boards to the existing ceiling, rather than to the joists themselves.  The consequence if this is that, if you climb a ladder, you can push the ceiling upwards by about an inch!  The plan is to screw it properly to the joists and then hopefully, at some point in the future, finish it off with coving.


The other surprise was the amount of woodchip wallpaper that I found hiding underneath the paint yesterday.  That was another couple of hours of my life that I'll never get back!  Large swathes of it was (very helpfully covered in Polyfilla, meaning that we weren't quite sure how far we had to strip the paper back.  It was a bit of trial and error!

If anyone in the area would like a brilliant plasterer, ours comes very highly recommended:

Palace Plastering