Thursday, 8 August 2013

Bathroom updates including the new shower


We never really intended to do much to the bathroom when we moved it, but there have been quite a few changes in there recently. I think this is turning out to be a "slow and steady" project.

Taps:
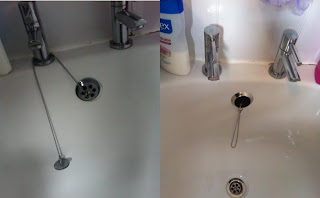
We were forced to replace the basin tap in the bathroom a little while ago when it decided to stop working. As the bath taps seemed to be heading towards the same fate, we bought matching taps at the same time (but didn't fit them immediately as they weren't as urgent). We've done that now (thanks Mike)... here they are:

Left: Old taps; Right: New taps (and new pretty candles!).
Apologies for the poor quality photos.
They look so much more modern and (bonus) they work properly too!

Close up of the new taps - aren't they pretty!
Bath Waste:
We've been using the bath a lot recently due to a) having a boiler that works and b) having a shower that didn't (see here) and we noticed that the waste pipe was leaking. But, a trip to B&Q, £5 and some of Mike's time later and it was all sorted.
Old bath waste pipe - it was pretty disgusting! We cleaned up the white section using vinegar and elbow grease and replaced the black section entirely.

Old plug - most of the "grime" is the putty they used to make it watertight.
New waste = leak free
Mike fitting the new overflow
Left: before, Right: shiny new overflow, plug and plug hole
Bathroom Light:
When our electrician was giving the Raggedy House a once over, he pointed out that the bathroom light was close to being illegal as it was a few centimeters away from being in "Zone 1" and it wasn't rated for it.

It was old, rusty and pretty dim anyway, so we decided to replace it.
Old rusty light - bleugh!
Top: Old light, Bottom: The new one
... And the newest edition - the shower:
Mike and his Dad did a sterling job of installing our new Mira Pronto EV shower a couple of days ago (thank you Peter!!). It was installed at the other end of the bath because it was easier to hide the pipe work in the wall at that end by accessing it from the hallway. Also, it means that when we're showering we're not standing at the "slopey" end of the bath. So, technically at the moment, we are a "two shower family" (it's just that one is still broken).
Pipework as seen from the hallway - the plasterboard has now been replaced and once decorated will be as good as new!
New pipes under the bath split from the existing hot/cold supplies to the bath to feed the shower
Pipe work from inside the bathroom - nice and neat

Panorama: two shower family. New shower on the left, old on the right
Ta-dah!
It is so much more powerful and prettier than the old one and should save us a bit of money too as its heated by Gas not Electric.

Mike also re-sealed the Bath at the same time as the sealant at the tap end was really shoddy. We need to seal around the taps too as the shower is at that end now, but that won't take long.

All that remains now is to disconnect and remove the old shower. Our electrician is going to help us with that when he comes next week and then we can remove it. We will also need to source some new tiles to repair the area where we take out the shower.

Bathroom Wish List:
There are a few things we want to do in the bathroom still, but we're in no hurry.
  • Replace the sink and toilet to make better use of the space and not bang our knees on the radiator;
  • Replace the bath panel (but not the bath);
  • Add some proper ventilation - it isn't too bad whilst we can leave the windows open, but it gets very mouldy in there during winter;
  • Re-paint the ceiling using anti-mould paint (just to freshen it up a bit and provide some protection);
  • Add some more interesting tiles in (I'm pushing for purple ones he he);
  • Re-grout the existing tiles, again to freshen it up;
  • Re-do the flooring;
  • Re-seal the basin.

Monday, 5 August 2013

Hello boiler, bye-bye shower

We had our new combi boiler fitted a few months ago. The old one was struggling - it could only produce about an inch of hot water before making some horrific noises, giving up and going cold again. Furthermore, when we started a boiler care contract with British Gas, we were basically told it was a waste of time as it would be impossible to source any of the parts for it if it broke. 

A new boiler was ordered and installed. We were quite lucky as the pipework was the right size already so there was very little work to do to install the new boiler - it took less than a day!

Left: Old; Right: New
The new one is nice and efficient and came with some gadgetry:

The new wireless receiver for the combined thermostat and timer has been installed in one of the kitchen cupboards to replace the old timer. Its left a bit of an unsightly gap but it will do!
Our new all-singing-all-dancing thermostat and timer. You can text it, control it online or use an iPhone app to switch it on/change the temperature/change the timings etc - very geeky!
So, now we can have baths again:
Left: The boiler would only produce about an inch of water before; Right: Now we can have real baths again!
It was a good thing we replaced the boiler when we did as about a month ago our electric shower gave up the ghost and stopped producing hot water. You would think during a heat wave a cold shower wouldn't be so bad, but it really was too cold!

The old broken shower.
We called out a plumber for a quote on fixing it and he managed to narrow it down to two parts: one which would cost £15 to replace and one which would cost closer to £60. As a new electric shower would cost around £70-£100 anyway, we decided to order the cheaper part and see if that would fix it, but it didn't work.

We were both a bit relieved at that! It was a pathetic shower anyway and when we chose our new boiler we picked one that would allow us to install a thermostatic mixer shower in the future. So, we've decided to bring our showery-plans forward and have bought a new Mira shower. We managed to get £60 off by buying it at the Hedge End B&Q store, rather than our local Southampton one.

Mira Pronta EV shower
We're hoping to install this soon, but at the moment we're making do with baths and showering at work.

Thursday, 1 August 2013

Bedroom 2 - Decorating Complete!

Apologies for the tardiness of this post! We did indeed get bedroom 2 finished and in time to get the radiator back on the wall for our lovely new boiler to be fitted (there will be a post on that soon I hope). Unfortunately, that weekend we also shifted everything that had been filling our living room up into bedroom 2 so it was out of the way which made taking "after" photos a bit tricky. I've had a stab at it though, so here we go...
Before: The walls weren't in a great state - there were some massive cracks (but mostly they were difficult to capture in a photo)
The plaster around the window has been repaired 
At the top of the window we removed a piece of wood that the curtain pole was attached to, re-plastered and put some proper coving in place.
The skirting didn't line up where an old chimney breast had been removed.

This wall had the old chimney breast in it and  hadn't been properly  plastered when they removed it. Although you can't see it from the photos, there has been a big improvement.

Before, During, After: The window

Currently we're using this space to store everything whilst we sort out our lounge
Once we've finished the lounge/diner we will finally be able to unpack and turn this from a storage space to a proper room - we'll post more pictures when we finally get to that stage. It still needs curtains and obviously we need to furnish it.

Work is beginning on the lounge/diner on the 12th August with our Electrician returning to sort out all of the many plug sockets that were left without electric after the kitchen was fixed and also to add some new ones in and replace the consumer unit whilst he's at it.

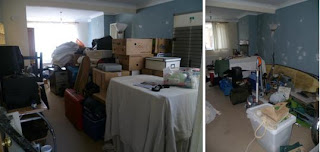
Here's a before and during of our poor lounge...
Left: Lounge/Diner just after we moved it; Right: current state... its getting better slowly!

Wednesday, 8 May 2013

Kitchen Improvements

We blogged a while ago about our Kitchen and the Bodged Electrics, which left the room in a bit of a sorry state. So, whilst we were sorting the study out over Easter, Kate's Dad came down to help us finish off the Kitchen.

Tiling and generally tidying up behind the fridge:
When we moved in to the house we found that there was a large patch of plaster missing on the wall behind the fridge. There were also several large holes and channels where wires had been chased through the walls in the past. There wasn't any skirting on the back wall, and the skirting on the right hand wall was only half painted. Furthermore, this bit of wall also housed two cooker switches, one of which had the spur running from it for the cupboard light and sockets in the lounge. Our electrician had sorted out these issues leaving us with just one safe (and legal) switch, but it left us with some broken tiles that needed replacing.

Unfortunately, we didn't get round to taking a "before picture" of this bit when we first moved in, so we pick up the tale after some painting, filling and plastering had taken place.

Before and After: Re-tiling, painting and adding Skirting Board
During: Thanks Daddy!
Re-tiling:
Another electrical issue we had was a socket overhanging the gas hob. This had to be moved out of the way and a blanking plate installed in its place. Again, this left us with quite a few broken or missing tiles, so Kate's Dad sorted that out too...
Before and After: Socket on the left replaced one where the blanking plate now lives
And closer up....good as new!
Putting up some blinds:
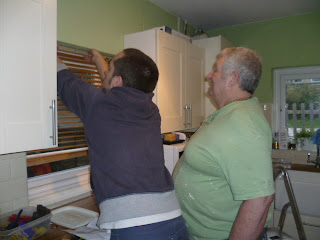
We are a bit over looked at the back of our house (and the front actually - the joy of a terraced house in the city), so we wanted some blinds in the Kitchen to add a bit of privacy and obviously to shade us from the sun when necessary! We picked up some reasonably priced Ikea Venetian blinds which we're mighty pleased with.

During
Before and After: Window 1
Before and After: Window 2
General Before/After:
This room is slowly changing so its easy to forget how different it is from when we first looked around...

Before: Estate Agent's Photo
After: It has already changed again since taking this - we've added a wine rack and unpacked our coffee machine!
Going Forward:
There are a few remaining fiddly jobs in the Kitchen (such as properly attaching some skirting behind the radiator which is currently just resting against the wall). Also, a few final tweaks will make it fully fit for purpose, such as adding these in the two corner cupboards to maximise our storage:

Le Mans Corner Storage Solution
But that is a little way off yet. For now, on with Bedroom 2! 

Tuesday, 30 April 2013

Bedroom 2 - The update...

The plasterer has been!  Here's the timelapse (again!) for the plastering being done.  It cuts out early as I managed to mess up charging the camera, but hopefully you should get the gist!


It has thrown up a few surprises, such as realising that the ceiling is not properly fixed in place.  It appears that whoever plasterboarded the ceiling just nailed the boards to the existing ceiling, rather than to the joists themselves.  The consequence if this is that, if you climb a ladder, you can push the ceiling upwards by about an inch!  The plan is to screw it properly to the joists and then hopefully, at some point in the future, finish it off with coving.


The other surprise was the amount of woodchip wallpaper that I found hiding underneath the paint yesterday.  That was another couple of hours of my life that I'll never get back!  Large swathes of it was (very helpfully covered in Polyfilla, meaning that we weren't quite sure how far we had to strip the paper back.  It was a bit of trial and error!

If anyone in the area would like a brilliant plasterer, ours comes very highly recommended:

Palace Plastering

Sunday, 28 April 2013

Bedroom 2 - The quick version!

So.  We had the next BIG push on the house this weekend!  Bedroom 2.  Hopefully, this should allow us to stop living in the lounge quite so much! 

Here is the (very quick) video version of what we did.  We've spent the last two days stripping two lathe and plaster walls (which were, unfortunately, beyond repair) in preparation of the plasterer who is coming on Tuesday morning.  It was either that or wait until June to get the room done.

For those who have never stripped a lathe and plaster wall, believe EVERYTHING that anyone else says about how messy it is.


We'll update you all again once we've had another development.

Thursday, 11 April 2013

At long last...

...the office is done!

Not that we need an office, but it's always nice to have somewhere to stick the computer and everything else like that!

It took about a week to do, during which time, we had hoped to complete both the office and bedroom two.  More to come on that later though!

For those who enjoy the geeky side of things, here's a little timelapse video showing the office from (almost) start to finish.  There's a bit of a gap in the decorating phase due to camera issues, but other than that, it's a fairly comprehensive catch up in about 30 seconds!


So on to bedroom two.

We had hoped to Polyfilla and paint the room during the same week.  However, when we've looked at it, the walls are in a truly appalling state.  So we're currently getting quotes to see how much it would cost to get the walls skimmed, so that they can have a nice finish.  And whilst we were at it, we've got quote to do the hallway too.  Which means (potentially) pulling down some old lath and plaster.  So you can see how this has all snowballed this week!

Oh well, decisions can wait for now!  We've got a nice, relaxing weekend planned and I'm going to try and stop thinking about the house for just two days!  We'll let you know how we get on...

Sunday, 31 March 2013

The Kettle Is Dead...Long Live The Kettle

I didn't realise how annoying such a small thing could be!  There's nothing quite like suddenly finding yourself unable to make your first coffee of the morning.  Evidently, this leads to me stomping around the house until I get my fix.

So off we go on another shopping trip.  Just what we need, more money to be spent!

Oh well.  Look at our shiny new kettle!

Tuesday, 26 March 2013

Catch up...Part 2 - The Bedrooms

I realised that, in all the updating, we failed to mention bedrooms! Let's start with a success story!

We figured that we should tackle the master bedroom fairly early on so that we could at least have somewhere comfy to sleep. We didn't like the existing colour scheme, it was too dark, so thought we'd try and lighten it a bit. We also wanted to tidy the walls up a bit as they were looking a bit haggered!

We settled on a colour scheme and thought we'd try our hand at wallpapering too. Don't be under any illusions, we went for the cheating option and found some 'Paste the Wall' stuff that we liked!

Firstly, we thought we'd attack the walls with some Polyfilla to fill a few holes. Or so we thought. This was the end result of the hole-filling expedition...maybe we should have just replastered!


Painting was next on the list, which went fairly smoothly (pun intended!). Which left just the wallpapering.

We approached this with some trepidation, neither of us having any experience. I'd like to think we didn't do a bad job though!


Having decorated, we then hit a small stumbling block. My brother came to visit the house whilst in town. He walked in the door, took one look at the carpet and announced 'You've got carpet moths!' Carpet-whats? Apparently quite common, this was why large portions of our carpets were threadbare. Great! Another unwanted expense.

The next 3 weeks (ish) were spent sleeping on the floor, with the mattress wrapped in a large plastic sheet, just to make sure we didn't attract any unwanted guests!  We made an appointment with Carpetright for them to come and replace all of the carpet in the hallway, stairs and landing as well as all 3 bedrooms.  We managed to go for the cheapest carpet they offer and still end up spending a fair chunk of money.  We did find out, however, that we had bought a synthetic carpet and that, therefore, we shouldn't have any problems with the moths in the future.  Bonus!

With the carpet fitted, we were finally able to finish off the bedroom, construct the bed and properly move in to that room.  We had a minor issue with the water coming through the front wall of the bedroom not long after moving in there, but this seems to have been a one-off, having had far heavier rain since and not had a repeat show.

So that's the master bedroom!

The other two bedrooms are a different story.

Bedroom two has, inadvertently, become a dumping ground for all sorts of bits which don't currently have a home elsewhere.  Bedroom three had some fantastic woodchip wallpaper, which appeared to have been partially and halfheartedly removed by some previous occupiers.  We wanted this taken off completely before decorating, so attacked nervously, crossing our fingers and hoping that it didn't pull any plaster off. A day or so later, the wall was stripped.  We needn't have worried, it was plasterboard!

So the plan from here on in?  We've got a week off together soon, so are planning to hit both of the remaining bedrooms, aiming to complete the decorating in that time.  Only then can we finally furnish bedroom three (the study) and make bedroom two the spare bedroom, ready to receive guests at last.

We'll let you know how we get on and we promise to include some more photos to show our progress :)

Wednesday, 20 March 2013

Taps - The conclusion?

So apparently the taps weren't quite done!


Olives.  Not avocados, as I have repeatedly called them today!

These tricky little blighters turned out to be the problem!  Despite stating confidently, last night, that the job was finished, it turned out that they were still leaking every so slightly.

So today, after getting a couple of hours sleep following my night shift, I decided to attack the problem and get it sorted, hopefully once and for all.  Stripping the pipes down again was a lot easier today having had the experience from yesterday.  I managed to cut the offending olives off fairly easily and replace them.  Add some new nuts to the compression joint and I hoped we were ready to go.

Fingers crossed.  Turn the water back on again.....Success!  No leaking anymore.  Another 20 minutes saw me fit the new plug-plunger thingy (edit: apparently called Pop-Up Waste) and we now have a functioning sink once more.

Do I dare attack the bath tomorrow and attempt to change those taps too?  I'm not sure...

Tuesday, 19 March 2013

Taps - Who knew they could be so awkward!

Our latest foray in to the world of home improvement has led us down the path of tap replacement.

This wasn't so much a choice, as a decision made for us.  Two nights ago, the taps in the bathroom decided that they had served their time and that they were no longer required to hold the water back.  So, on returning home, we found the taps running and impossible to turn off without isolating the water pipes leading to the taps.

This has meant that the last two days have been spent trying to buy/change the taps.  I have absolutely no plumbing experience, which will become quite evident later!

We decided on some nice, clean-cut taps from Screwfix, thinking that we would replace both the sink and bath taps so that everything matched.

Yesterday was mostly spent removing the old tap...


...and figuring out what I needed to do to install the new one...


...which was completed today...(ish!).

Unfortunately, my wonderful plumbing skills ended just shy of a proper job.  Having connected everything up correctly (I thought), I turned on the water supply again and, to my joy, watched water leaking from the compression joint in the pipe!  Time had run out though, so I had to isolate the water, get changed, have dinner and run off to work, thinking that I could return to the job tomorrow.

WRONG!

As if destined by some annoying little quirk of fate (the one that states "as soon as you can't do anything about the problem, that's when it'll rear it's ugly little head"), I got the phone call from home almost as soon as I got to work.  "There's water dripping through the ceiling in the kitchen".... Great!.

Annoyed, stressed and stuck at work, the job fell to the lady of the house to try and fix it.  Which she did with apparent ease, with the help of our friend, Daz (Cheers dude!). Apparently, it was a simple case of tightening the compression joint.  Makes me wonder how I managed to make the job last for most of the day!  Anyway, either which way, I think we now have a working, non-leaking and presentable sink tap.

Not bad for a days work.  At this rate, the house might be finished before I retire (in 3 decades time!).

Catch up...The Tale of the Kitchen and the Bodged Electrics

Here's a quick attempt to start to bring you up-to-date with what's already happened with the house.

We completed on the house 6 weeks ago.  We turned up to find out that the vendors hadn't moved out yet, despite us having the keys.  Interesting (thanks for that estate agents)!  After an hour spent at a friends' house, we were finally able to get into the house.

We had always planned to have an overlap with our rented house so that we could try and get the ready before we moved in. "The best laid plans..." and all that!

We got on with decorating the kitchen as we were having our brand new "dream" cooker and a washing machine delivered four days after completetion.  It was all going so well and then the "fun" started when they came to deliver and install the cooker.

But before that, here's the quick catch-up video of the kitchen decoration...


The men from Currys arrived with the cooker and, after struggling for 15 minutes or so, managed to get it as far as the lounge.  They came into the kitchen to check what needed to be done to install the cooker and almost burst out laughing when they saw the electric cable lying on the floor behind the cooker cavity.  A quick look proved that this had evidently been installed by a complete cowboy who had elected to try and run a further 3 double sockets and a light off the cooker ring.  We were swiftly told that they "wouldn't touch it with a barge pole" and that it needed to be sorted before they would come back and install the cooker.

Long story short (because it is pretty long!) it took just over 3 weeks to get the issue sorted.  A quick run-down of the identified problems included:

  • A dodgy spur being run from the cooker switch, far exceeding the fuse rating;
  • No earthing to the water supply at all;
  • Wires running under the cabinets, through a damp puddle to the washing machine;
  • We found approximately 5 junction boxes under the floorboards of one bedroom, resembling something like spaghetti junction!
  • Overloaded consumer unit;
  • Most of the sockets in the house weren't earthed;
  • There weren't any proper "rings" in the house, just a series of long and randomly winding spurs.
So, the electrics are sorted for the moment (well they're legal and safe now at least).  The next project is to rewire the lounge/dining room, once we have managed to move out of it!

And we have finally managed to get our cooker installed...


...so at least we can cook now!  

We're still living pretty much in the lounge, but we're slowly getting out!


Monday, 18 March 2013

The Raggedy House

So.  Six weeks ago (ish), we bought our first house.  'Citing times..and somewhat challenging it would appear!

We thought we'd been pretty savvy in our approach.  We spent about 6 months researching all aspects of buying a house, finding solicitors, surveyors etc.  After two failed attempts, we finally found our house.  A lovely little terrace, perfect for our first place and (so we thought) not too much work to be done.

Unfortunately, we let ourselves be sweet talked out of certain aspects of the purchase such as electrical and plumbing checks.  Oops.  NEVER let yourself be talked out of these things if you're really determined to do them.  We did, and we're slowly dealing with the consequences.  
Which leads us to here.  This is our attempt to find some kind of cathartic release for the stress and frustrations.  So try to keep up, I'm sure there will be plenty more surprises yet!